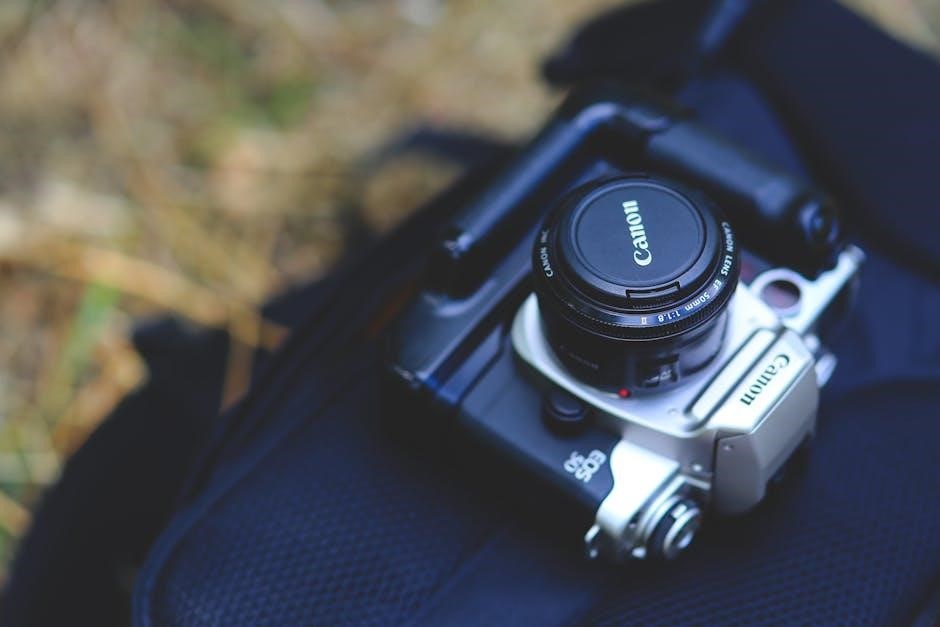
The Zoom H6 is a portable digital audio recorder designed for professional-grade recording, offering versatility and high-quality sound capture in various environments.
Known as the successor to the H5, it features interchangeable mic capsules, making it ideal for filmmakers, journalists, and musicians seeking reliable audio solutions.
1.1 Overview of the Zoom H6
The Zoom H6 is a portable digital audio recorder designed for professional-grade recording, offering versatility and high-quality sound capture in various environments. Known as the successor to the H5, it features interchangeable mic capsules, making it ideal for filmmakers, journalists, and musicians seeking reliable audio solutions. The device supports multiple recording formats, including WAV and MP3, and allows users to organize files into folders named ZOOM0001 to ZOOM9999 for each project. With its intuitive interface and robust capabilities, the H6 is a popular choice for capturing clear and precise audio in fields such as broadcasting, live events, and content creation. The manual highlights its ease of use, with features like voice memo recording and stereo file management. Its portability and professional-grade performance make it a trusted tool for audio professionals worldwide.
Key Features and Capabilities
The Zoom H6 offers advanced audio recording with interchangeable mic capsules, high-quality preamps, and multiple recording modes, ensuring versatility for professionals and creators alike in various settings.
2.1 Built-In Microphones
The Zoom H6 is equipped with built-in microphones that provide high-quality audio capture. These microphones are designed to handle a wide range of recording scenarios, from capturing subtle nuances in studio settings to handling loud environments without distortion.
The built-in mics feature a XY stereo configuration, allowing for accurate and immersive sound reproduction. They are also capable of capturing a wide frequency response, ensuring that every detail of the audio is preserved.
Additionally, the H6’s built-in microphones are resistant to wind and other environmental noises, making them ideal for field recordings. The microphones can be adjusted to different angles to optimize sound capture, providing flexibility for various recording needs.
Overall, the built-in microphones of the Zoom H6 are a key feature that contributes to its reputation as a versatile and reliable audio recording device.
2.2 Interchangeable Mic Capsules
The Zoom H6 stands out with its interchangeable mic capsules, offering unparalleled flexibility in audio recording. This feature allows users to switch between different types of microphones, catering to various recording needs and environments.
By simply detaching the existing capsule and replacing it with another, users can adapt the H6 for specific applications, such as shotgun microphones for film or lavalier microphones for interviews. This modularity ensures that the device remains relevant across different professional settings.
The ability to interchange capsules also extends the lifespan of the recorder, as users can upgrade or replace capsules without needing a new device. This innovative design makes the Zoom H6 a valuable investment for audio professionals seeking versatility and high-quality sound.

Setting Up the Zoom H6
Setting up the Zoom H6 involves unboxing, installing batteries, and charging. Initial setup includes navigating the menu, updating firmware, and configuring basic settings for optimal recording performance.
3.1 Unboxing and Initial Setup
Unboxing the Zoom H6 reveals the recorder, two AA batteries, a foam windshield, USB cable, and a quick start guide. Begin by inserting the batteries into the compartment on the back. Ensure they are correctly oriented to match the polarity markings. Power on the device using the record button or the power button. The LCD screen will light up, prompting you to set the date, time, and format. Use the touchscreen or navigation buttons to complete these settings. Familiarize yourself with the front panel controls, including the record button, gain knobs, and navigation buttons. Finally, attach the foam windshield to reduce wind noise during recordings. This initial setup ensures you’re ready to begin capturing high-quality audio with your Zoom H6.
- Insert batteries correctly, matching the polarity.
- Power on and set date, time, and format.
- Familiarize yourself with controls and attach the windshield.
3.2 Charging the Battery
The Zoom H6 can be powered using two AA batteries or via USB. For USB charging, connect the recorder to a computer or a USB wall adapter using the provided cable. The device supports USB bus power, allowing it to charge while connected. The LCD screen displays a battery icon indicating the charge level. Charging typically takes 4-5 hours for a full charge. Always use a genuine Zoom adapter or a high-quality USB charger to avoid damage. Avoid overcharging, as it may reduce battery longevity. If using AA batteries, ensure they are alkaline or rechargeable for optimal performance. Keep spare batteries handy for extended recording sessions. Proper charging ensures reliable operation during field recordings or live events.
- Use USB or AA batteries for power.
- Charge via USB using the provided cable.
- Avoid overcharging to prolong battery life.
3.3 Updating Firmware
To ensure optimal performance, it’s essential to keep the Zoom H6 firmware up to date. Visit the official Zoom website to download the latest firmware version. Once downloaded, connect the H6 to your computer via USB and follow the on-screen instructions. Use the provided USB cable to avoid connectivity issues. Before updating, ensure the battery is fully charged or use an AC adapter to prevent power interruptions. Do not disconnect the USB cable during the update process, as this may cause system errors. Once the update is complete, restart the device to apply the changes. Regular firmware updates provide improved functionality, new features, and bug fixes, ensuring your H6 operates at its best.
- Download updates from Zoom’s official website.
- Connect via USB and follow on-screen instructions.
- Avoid disconnecting during the update process.

Navigating the Interface
The Zoom H6 features an intuitive interface designed for easy navigation. The front panel includes essential controls like the LCD display, transport buttons, and menu navigation keys. Use the Menu button to access advanced settings, while the Back button helps you exit menus. The Home screen provides quick access to recording modes and settings. The interface is user-friendly, allowing seamless operation during recording sessions.
- Front panel controls for quick access.
- Menu button for advanced settings.
- Home screen for modes and customization.
4.1 Front Panel Controls
The Zoom H6’s front panel is equipped with a range of controls designed for quick and intuitive operation. The LCD display provides clear visibility of recording settings, levels, and mode selection. Transport buttons (Record, Play, and Stop) are centrally located for easy access. The Gain knobs allow precise adjustment of input levels for each channel, while the Headphone Volume dial ensures optimal monitoring. A Menu button is available for navigating deeper settings, and the Home button returns you to the main screen. The front panel also features a Mic In button for enabling external microphones and a Lo Cut switch to reduce low-frequency noise. These controls are arranged logically, making it easy to manage recordings and settings on the go.
- Intuitive layout for efficient control.
- Transport buttons for recording and playback.
- Gain knobs for precise level adjustment.
- Headphone Volume dial for monitoring.
4.2 Menu Navigation
Navigating the Zoom H6’s menu is straightforward, with a logical structure that allows quick access to various settings. Press the Menu button to enter the menu system, where you can use the Up and Down buttons to scroll through options. The Select button confirms choices, while the Back button returns you to the previous screen. The menu is divided into tabs, such as Home, Audio, File, and System, each containing specific settings. Use the Right button to navigate to submenus and the Left button to return. This intuitive design ensures efficient customization of the device to meet your recording needs.
- Press Menu to access the menu system.
- Use Up and Down to navigate options.
- Select confirms choices; Back returns to the previous screen.
- Menu tabs organize settings for easy access.
Recording Audio with Zoom H6
The Zoom H6 offers versatile recording options, accommodating various scenarios like interviews, live performances, and field recording. Its intuitive interface ensures high-quality audio capture with ease.
5.1 Starting a New Recording
Starting a new recording on the Zoom H6 is straightforward. First, ensure the device is powered on and the SD card is properly inserted. Navigate to the home screen and select your desired recording mode, such as WAV or MP3. Use the cursor buttons to choose the mode and press the record button to confirm. Before recording, check the SD card status to ensure sufficient storage space. If needed, format the card via the menu. The H6 allows you to select between stereo, 4CH, MTR, or other modes, depending on your needs. Once ready, press the record button again to begin recording. The pre-record function can also be enabled to capture up to two seconds before you press the record button, ensuring no important audio is missed. Recorded files are automatically saved with a timestamp for easy organization.
5.2 Adjusting Gain Levels
Adjusting gain levels on the Zoom H6 is essential for capturing high-quality audio. Start by connecting your microphone or using the built-in mics. Use the gain knobs located on the front panel or the XY mic capsule to set the desired levels. For external mics, adjust the XLR inputs’ gain knobs. The H6 provides LED indicators to help you monitor levels: green for optimal signal, orange for high levels, and red for overload. Aim for peaks between -12dB and -6dB to avoid distortion. Use the menu to fine-tune gain settings, such as enabling the PAD (-20dB) for loud sources or the low-cut filter to reduce noise. Press the gain knob to reset levels if needed; Proper gain staging ensures clear and distortion-free recordings, making it a critical step before starting any session.
5.3 Using Different Recording Modes
The Zoom H6 offers multiple recording modes tailored for various scenarios. The default Stereo Mode is ideal for capturing a wide soundstage using the built-in or external microphones. 4CH Mode allows simultaneous recording of four independent channels, perfect for interviews or live performances with multiple mics. MTR Mode enables multi-track recording, giving you individual control over each track during post-production. Additionally, the Voice Mode optimizes settings for voice-overs or podcasting, with features like voice emphasis and a low-cut filter to reduce plosives. Switching modes is done via the home screen, and each mode adapts the interface to suit your needs. Experiment with these modes to find the best fit for your recording environment and ensure professional-quality results.
Managing and Organizing Recordings
Efficiently manage your recordings by organizing files into folders, browsing, and reviewing them on the device. Backup recordings to prevent data loss, ensuring your work is secure. Use clear, descriptive names for easy retrieval and organization on both the H6 and your computer.
- Organize recordings into logical folders for quick access.
- Backup files regularly to avoid losing important data.
- Use clear naming conventions for seamless workflow.
This approach ensures your recordings remain tidy and easily accessible, enhancing productivity and efficiency.
6.1 File Naming and Organization
The Zoom H6 automatically saves recordings with a date- and time-stamped filename, making it easy to identify and organize your files. Recordings are stored in folders like MUSIC, VOICE, or customizable FOLDER01 to FOLDER10, allowing you to categorize your work effectively. Use clear, descriptive names for folders to match your projects, ensuring easy retrieval later. You can also rename files directly on the device for better clarity. For enhanced organization, create separate folders for different sessions or topics, and avoid overcrowding a single folder. This system helps maintain a structured workflow and prevents file clutter. By organizing your recordings thoughtfully, you can quickly locate and manage your audio files, whether on the H6 or when transferring them to a computer.
- Use descriptive folder names for easy identification.
- Separate recordings by project or session.
- Rename files directly on the device if needed.
- Regularly clean up unused files to save space.
This organized approach ensures your recordings remain accessible and streamlined for future use.
6.2 Transferring Files to Computer
Transferring files from the Zoom H6 to your computer is a straightforward process. Connect the device to your computer using a USB cable, ensuring the H6 is powered on. The H6 will automatically enter USB mode, and your computer will recognize it as a removable storage device. You can then access the recordings through your computer’s file explorer or Finder. For Mac or PC, the H6 appears as a mounted drive, allowing you to drag and drop files to your desired location. Use the USB menu on the H6 to select STORAGE mode for file transfer; Always use the supplied USB cable to ensure compatibility and avoid data corruption. After transferring, organize your files into folders on your computer for easy access and backup. This method ensures your recordings are safely transferred and ready for editing or sharing.
- Connect the H6 to your computer via USB.
- Select STORAGE mode in the USB menu.
- Transfer files to your computer using drag-and-drop.
- Organize files into folders for easy access.
This process ensures efficient and secure file transfer from the H6 to your computer.
6.3 Deleting Unwanted Files
To manage storage on your Zoom H6, you can delete unwanted files directly from the device. Navigate to the File menu, select the folder containing the files you wish to delete, and choose the specific file. Use the Cursor buttons to highlight the file and press Enter to access the delete option. Confirm the deletion by selecting OK. For multiple files, press Menu and enable Multi-Select, then choose the files to delete. To delete all files in a folder, select Delete All from the menu. Always confirm deletions to avoid losing important recordings. Deleted files are moved to the Trash folder, allowing recovery if needed. To permanently delete files, navigate to the Trash folder and delete them there. Regularly deleting unwanted files helps maintain storage space and keeps your recordings organized.
- Navigate to the File menu and select the folder.
- Highlight the file and press Enter to delete.
- Use Multi-Select to delete multiple files.
- Permanently delete files from the Trash folder.
Deleting unwanted files ensures efficient storage management on the H6.

Customizing Settings for Enhanced Use
Customize the Zoom H6 to suit your workflow by adjusting preferences, such as audio formats, lo-cut filters, and playback speeds. Tailor settings for enhanced functionality.
- Adjust audio settings for optimal recording quality.
- Set up loops and markers for easy navigation.
- Customize playback options for efficient review.
Personalize the H6 to streamline your recording process.
7.1 Configuring Audio Settings
Configuring audio settings on the Zoom H6 allows you to tailor recordings to your specific needs. The device offers a range of options, including sample rates (44.1–96 kHz) and bit depths (16/24-bit). You can also enable or disable pre-recording, which captures up to 2 seconds before you press record. The low-cut filter can be adjusted to reduce low-frequency noise, such as rumble or wind, with options at 80 Hz or 120 Hz. Additionally, the H6 features compression and limiting to control dynamic range and prevent distortion. These settings ensure high-quality audio capture in various environments. Customize these parameters to optimize your recordings for professional results.
- Adjust sample rate and bit depth for desired quality.
- Enable pre-recording for capturing unexpected sounds.
- Use low-cut filters to minimize unwanted low frequencies;
- Apply compression and limiting for consistent audio levels.
These configurations help achieve precise and professional audio outcomes.
7.2 Setting Up Loops and Markers
Setting up loops and markers on the Zoom H6 enhances your workflow by allowing precise control over audio playback and organization. Loops enable continuous playback of a selected section, ideal for reviewing specific parts of a recording. To create a loop, press the LOOP button during playback, then set the start and end points using the SET button. Markers, on the other hand, act as bookmarks, letting you quickly jump to key points in your audio. Press the M button during playback to place a marker. Both features are accessed via the front panel controls, with options to adjust settings in the menu. This functionality is particularly useful for editing, reviewing, or practicing, making it a valuable tool for professionals and creators alike.
- Use the LOOP button to create and manage loops.
- Place markers with the M button for easy navigation.
- Adjust loop and marker settings in the menu for customization.
These tools streamline audio management and enhance productivity.
7.3 Customizing Playback Options
Customizing playback options on the Zoom H6 enhances your listening experience and streamlines workflow. The device offers various features to tailor playback to your needs. You can adjust the playback speed, which is useful for transcription or detailed analysis. Additionally, the H6 allows you to set loops for continuous playback of specific sections, aiding in precise review. Volume control is also customizable, ensuring optimal audio levels during playback. Furthermore, you can select different tracks or files to play back, making it easy to navigate through multiple recordings. The H6 supports both mono and stereo playback, catering to different listening preferences. For organization, you can create and manage playlists or organize files into folders. Metadata options, such as markers or tags, enable quick access to specific points in your audio. These features are accessed via the front panel controls or the menu, providing flexibility and convenience for users.
- Adjust playback speed for transcription or analysis.
- Set loops for continuous playback of specific sections.
- Customize volume levels for optimal listening.
- Select between mono and stereo playback.
- Organize files into playlists or folders for easy access.
- Add markers or tags for quick navigation.
These customization options make the Zoom H6 a versatile tool for professionals and creators.
Connecting and Using External Microphones
The Zoom H6 supports external microphones via XLR and 3.5mm inputs, offering flexibility for high-quality audio capture. Connect mics directly for expanded recording options.
8.1 Attaching External Mics
To attach external microphones to the Zoom H6, start by identifying the appropriate input. The H6 features four XLR/TRS combo ports on the bottom and a 3.5mm input on the side. For XLR microphones, use an XLR cable to connect to the combo ports. For 3.5mm mics, plug directly into the 3.5mm input. Ensure the microphone is compatible with the H6’s input types. Securely tighten XLR connectors to prevent loose connections. If using a condenser microphone, enable phantom power via the menu before connecting. Power on the H6 and navigate to the input menu to select the correct input type (Mic or Mic+48V). Adjust the input level to optimize your recording. Properly attaching external mics ensures high-quality audio capture and expands the H6’s versatility for various recording scenarios.
8.2 Using XLR Inputs
The Zoom H6 is equipped with four XLR/TRS combo inputs, allowing you to connect professional microphones directly. To use XLR inputs, insert the XLR connector into the corresponding port on the bottom of the device. Ensure the connector is fully seated and secured. For balanced audio, use XLR cables to minimize noise and interference. If using a condenser microphone, enable phantom power via the menu by selecting the Phantom Power option for the desired input. Adjust the gain level using the dedicated knobs on the front panel to optimize the signal. Properly using XLR inputs ensures high-quality audio capture and allows for professional-grade recordings. Always test the connection before recording to confirm the signal is being received correctly. This feature makes the H6 versatile for studio, live, and field recordings.
8.3 Phantom Power and External Mics
Phantom power is essential when using condenser microphones with the Zoom H6, as these microphones require power to operate. The H6 provides +48V phantom power, a standard voltage for condenser mics. To enable phantom power, navigate to the Phantom Power option in the menu and select the specific input you’re using. It’s crucial to enable phantom power only for inputs with condenser microphones, as it can damage dynamic microphones or cause noise. The H6’s phantom power is typically turned off by default to prevent accidental damage, so you’ll need to activate it each time you use a condenser mic. All four XLR inputs on the H6 support phantom power, allowing flexibility in your recording setup. While the H6 doesn’t have LED indicators for phantom power, you can confirm it’s active through the menu or by testing the microphone’s function. This feature ensures high-quality recordings in various environments, whether studio or field, by providing the necessary power for optimal microphone performance.
Using the Zoom H6 with Computers
The Zoom H6 seamlessly connects to computers via USB, enabling direct audio transfer, firmware updates, and use as a USB audio interface for recording or live streaming.
9.1 Connecting via USB
To connect the Zoom H6 to your computer via USB, locate the USB port on the device, typically found on the side or back. Use a provided or compatible USB cable to link the H6 to your computer. Ensure the connection is secure to avoid any issues during data transfer or audio recording. Once connected, the H6 will likely be recognized by your computer automatically. However, installing the appropriate drivers from Zoom’s official website is recommended for optimal functionality. These drivers ensure compatibility and enable features like using the H6 as a USB audio interface; After installing the drivers, configure your recording software to recognize the H6 as the input device. This process varies by software but generally involves selecting the H6 from the audio settings menu. Troubleshoot any connectivity issues by checking the USB connection, restarting devices, or reinstalling drivers. The H6 can be powered via USB, eliminating the need for batteries during computer use, though batteries can serve as a backup. Finally, test the connection by recording audio to ensure it’s functioning properly;
9.2 Using as a USB Audio Interface
The Zoom H6 can seamlessly function as a USB audio interface, allowing you to record high-quality audio directly to your computer. Once connected via USB, the H6 appears as an audio input device in your recording software. To use this feature, ensure the H6 is in “Audio Interface” mode, which can be enabled through the device’s menu. This mode allows you to choose between different input options, such as the built-in microphones or external mics connected to the XLR inputs. Your computer will typically recognize the H6 automatically, but installing the Zoom Audio Interface driver from the official Zoom website is recommended for optimal performance. Once configured, you can select the H6 as your input device in your digital audio workstation (DAW) or recording software. This setup is ideal for podcasting, voice-overs, and multitrack recording, leveraging the H6’s versatility and audio quality.